Forbidden Arc Editor
In BayesiaLab, you can formally prohibit arcs by defining so-called Forbidden Arcs.
Defining Forbidden Arcs prevents BayesiaLab’s learning algorithms from adding such arcs to the network during the structural learning process.
You can define the Forbidden Arcs in the Forbidden Arc Editor, which you can access in three ways:
- Select
Main Menu > Edit > Edit Forbidden Arcs - Right-click on the background of the Graph Panel to bring up the Context Menu, then select
Edit Forbidden Arcs - Click the
Forbidden Arcindicator in the Status Bar
The Forbidden Arc Editor features five buttons:
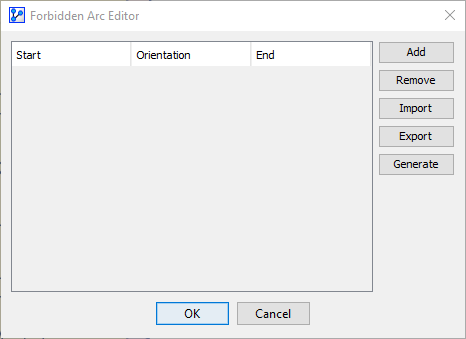
Add/Remove
The Add button brings up a dialog box in which you can define constraints on arcs:

Here, you can specify precisely what types of arcs should be forbidden. You can specify constraints for individual nodes and classes or create meta constraints that apply to groups of nodes and classes.
This provides many possible configurations, of which we now illustrate a small selection of constraints. We use the following fully connected network as a starting point for showing the effects of applying Forbidden Arcs. While a fully connected network is rarely feasible (or useful) if you have more than a few nodes, here it can highlight the absence of arcs due to the Forbidden Arc constraints.
There are many ways you can define individual Forbidden Arcs or define sets of Forbidden Arcs in the Forbidden Arc Editor, for instance:
- Between a node and another node: N1 — N2
- Between a node and all other nodes: N1 — <All Nodes>
- Between a node and a class: N1 — Class A
- Between two classes: Class A — Class B
- Between nodes of the same classes (intra-class): <Same Class> — <Same Class>
- Between nodes of different classes (inter-class): <Different Class> — <Different Class>
- Between nodes or classes and each of the classes:
Furthermore, you can specify which arc orientations are prohibited:
- Prevent the arc from the node/class in the
Startcolumn to the node/class in theEndcolumn (→) - Prevent the arc in both directions (—)
Workflow Animation
This animation shows how we add a random selection of constraints and then perform Unsupervised Learning using the EQ Algorithm with a Structural Coefficient of 0. Without Forbidden Arcs, this structural learning process would produce a fully connected network with 21 arcs. Given all the Forbidden Arcs we specified, we obtain, after learning, a much simpler network with only six arcs.
Note that defining a Forbidden Arc — after the fact — on a machine-learned network will not modify that network. The arc prohibition only becomes relevant when you perform learning again.
Import/Export Forbidden Arcs
Especially with an extensive set of constraints, it can be very practical to save the currently-defined Forbidden Arcs and reuse them later. You can do that easily using the Import and Export functions of the Forbidden Arc Editor.
The next animation shows the following steps:
- Open the Forbidden Arc Editor
- Click
Export - Specify a file name
- Open the exported text file and compare the Forbidden Arc Editor with the syntax in the exported file.
Generate
Additionally, you can generate Forbidden Arcs based on specific measures.
By clicking the Generate button, you can prohibit arcs based on:
- Negative Pearson’s Correlation
- Positive Pearson’s Correlation
Example & Workflow Animation
The following animation shows a random fully connected network featuring both positive and negative correlations for arcs. Just for emphasis and outside the workflow, we highlight those arcs in this demo.
Forbidding Arcs
In addition to managing Forbidden Arcs via the Forbidden Arc Editor, you can apply constraints ad hoc via the Context Menu:
- Right-click on an arc or a selection of arcs
- From the Context Menu, select
Forbid, and then choose one of the following:Current DirectionOpposite DirectionBoth Directions